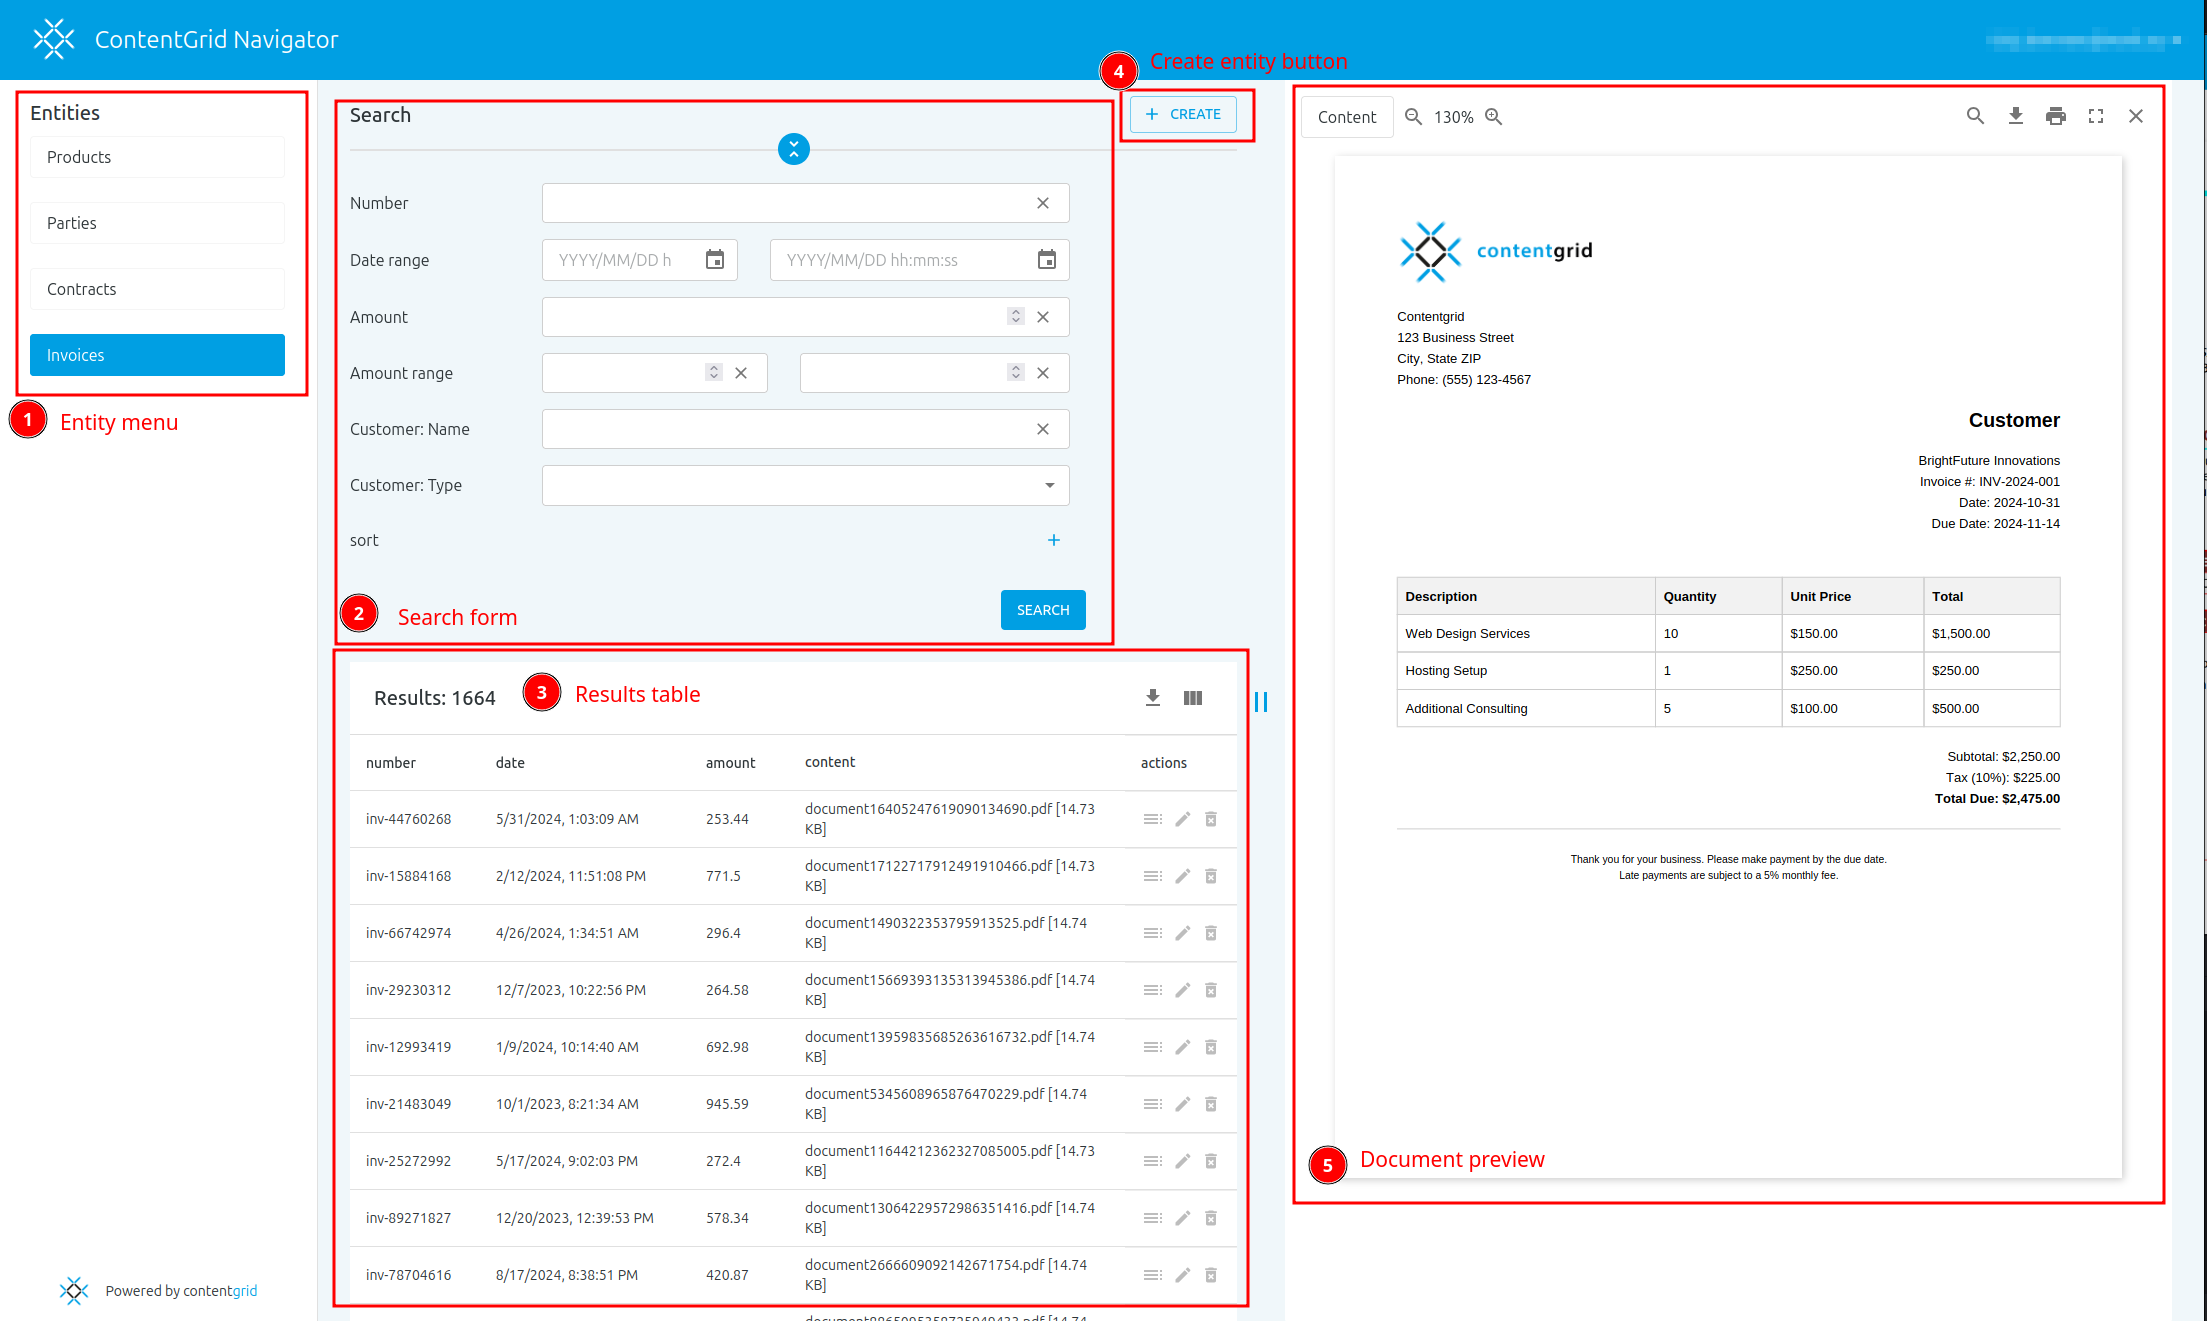
Navigator

ContentGrid Navigator is the out-of-the box frontend for you ContentGrid application. The interface will adapt automatically to the entities and attributes you have configured.

Overview

An overview of the different UI elements of Navigator.
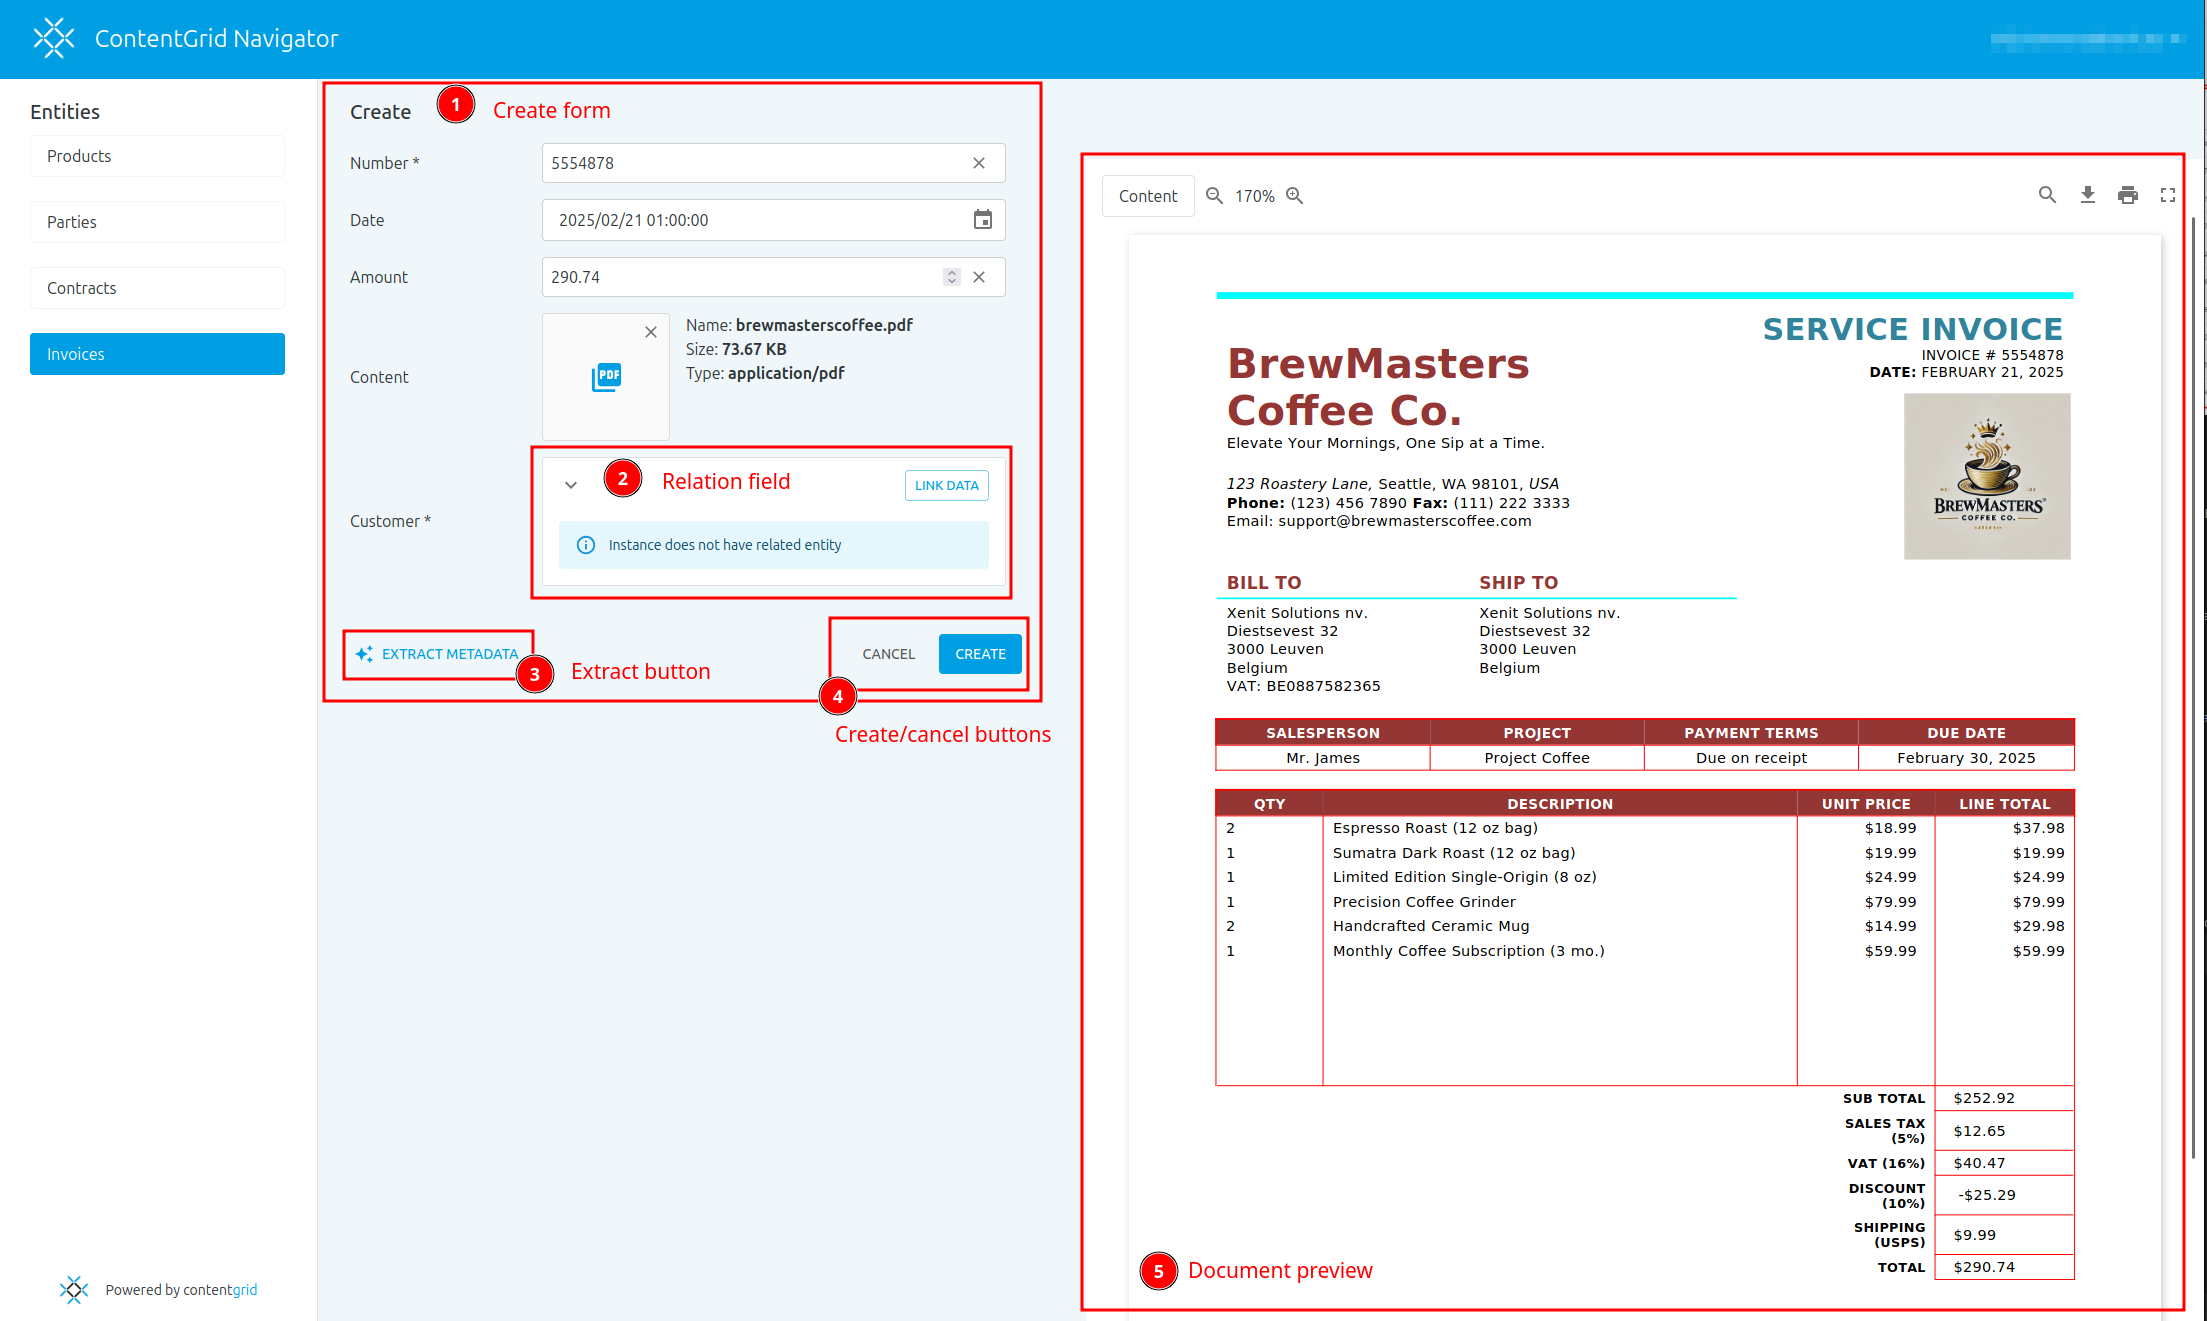
Create entity

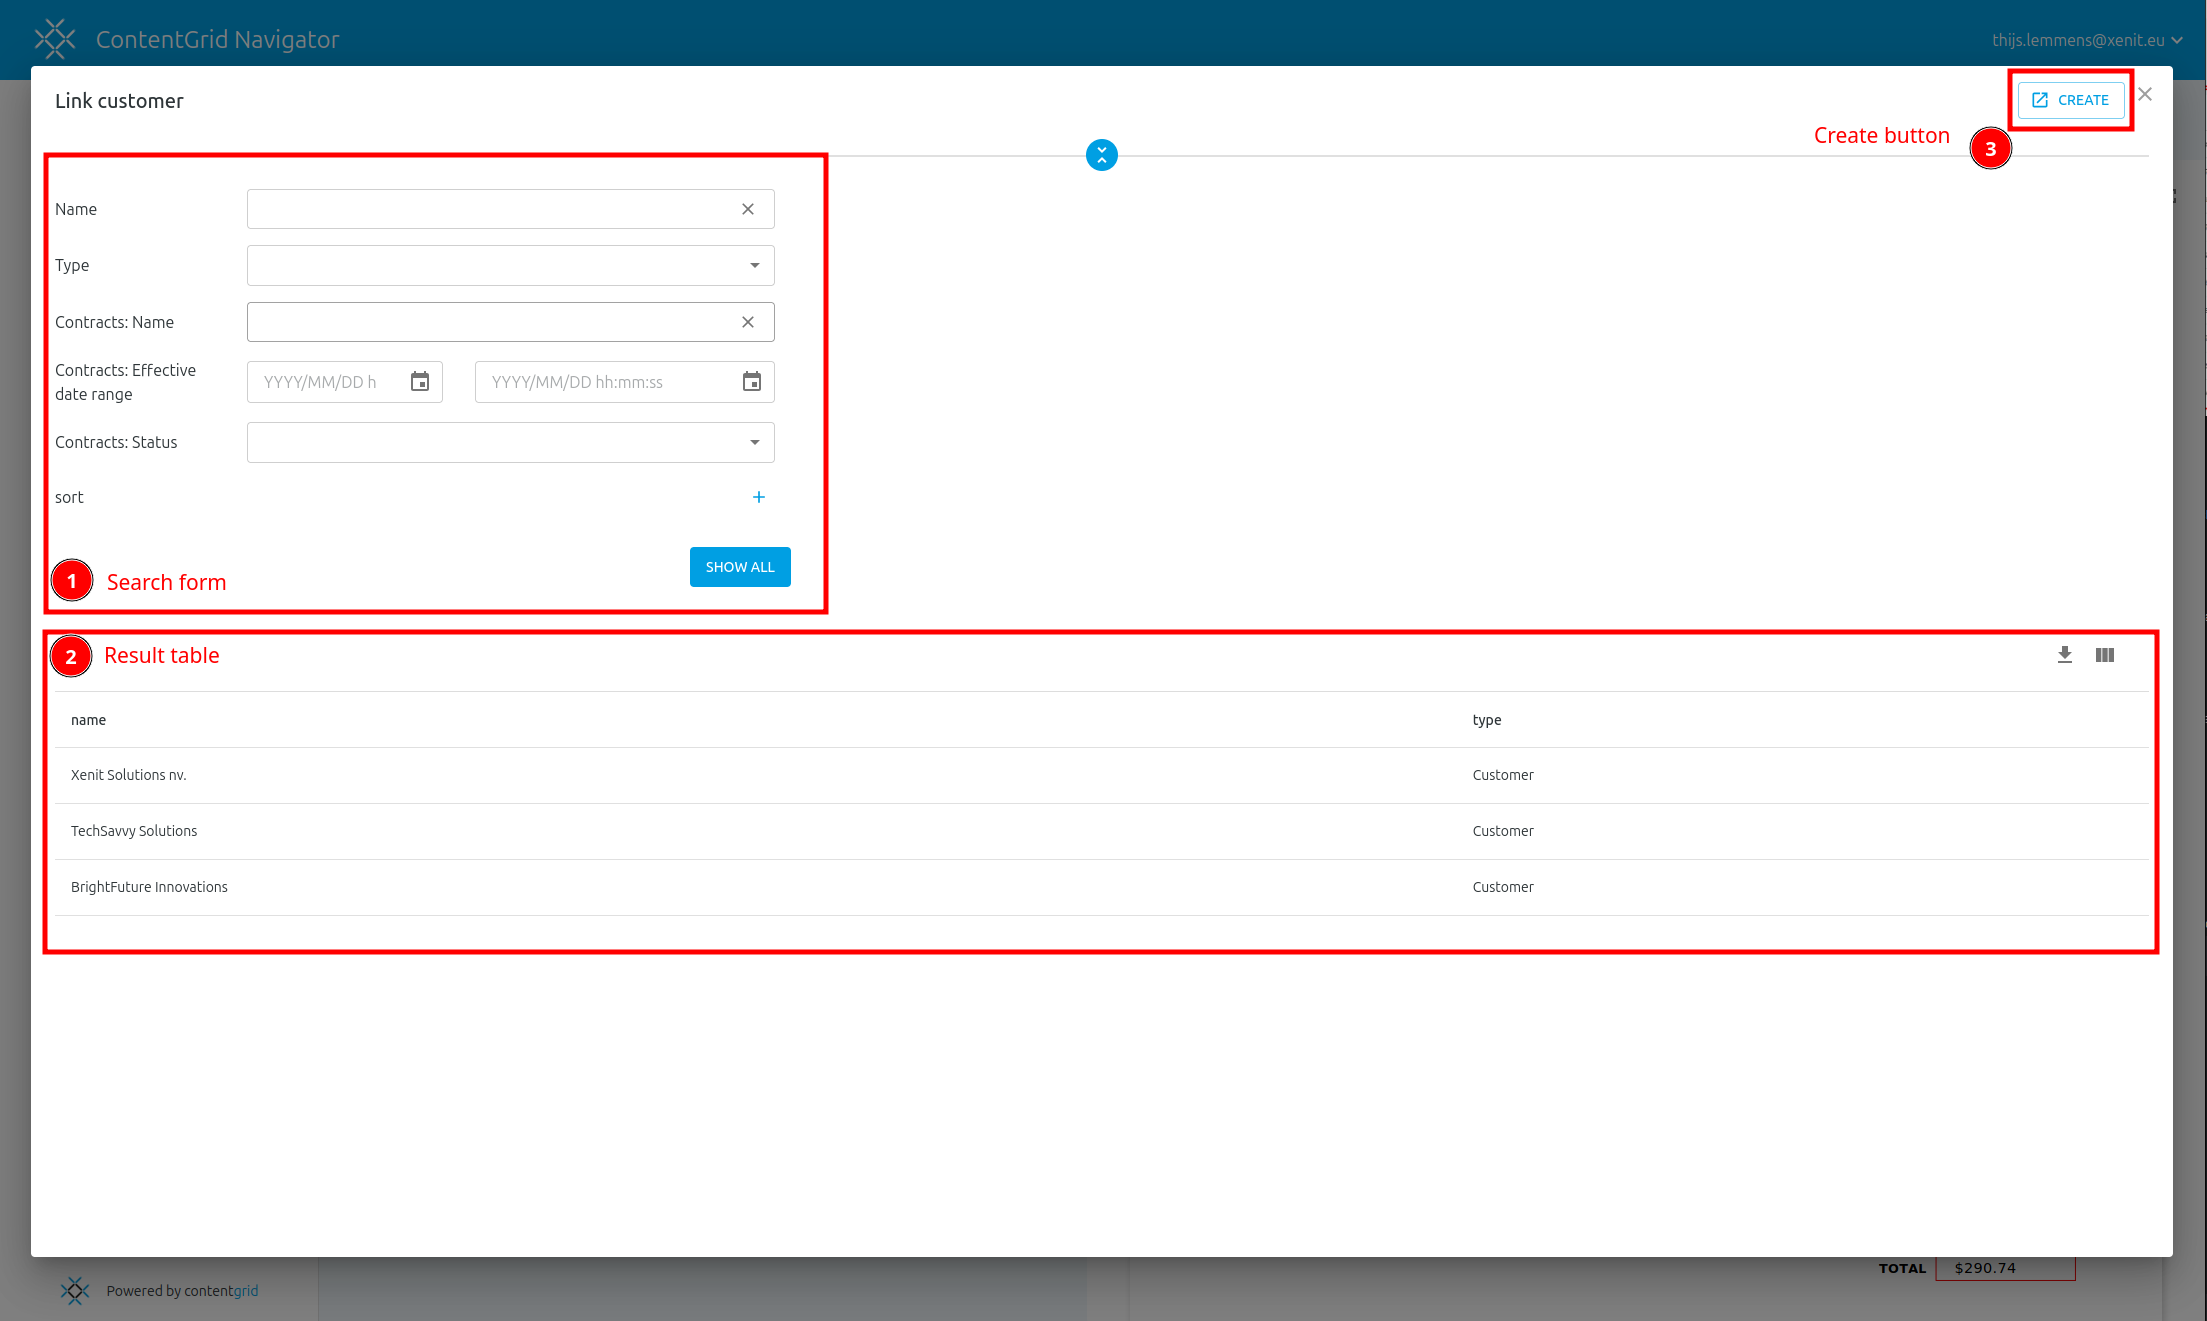
Guide on how to create new entities with metadata and relations.

Subsections of Navigator

Navigator overview

Navigator overview Navigator overview

(1) Entity menu

The entity menu allows you to select an entity type for search and creation. The selected entity is highlighted.

(2) Search form

In the search form you can search on the searchable metadata of the entity and it’s related entities, as defined in the Console.

(3) Results table

The results table shows up after search and displays the search results as a table with metadata. Clicking one of the lines in the table will open the document preview.

(4) Create entity button

Clicking the create entity button will bring you to create form where you can fill in the metadata, files and link the relations for this entity.

(5) Document preview

The document preview will display a preview of the line selected in the results table. If there are multiple files attached to that entity, there will be a dropdown selector to choose what file you want to preview.

Info

The previewer can natively show PDF’s and images. For other documents, ContentGrid will attempt to transform the file to PDF. Currently, these formats are supported for previewing:

  • pdf
  • jpg, png
  • doc, docx, ppt, pptx, xls, xlsx
  • odt, ods, odp

Of course, other file formats can still be used in ContentGrid, but they don’t have out-of-the-box previews.

Creating entities

Create entity Create entity

(1) Create form

In the create form you can fill in the metadata fields of the entity you are creating. Mandatory fields are indicated with an asterisk. Datetime fields have a datetime picker. Content fields support drag and drop and opening a file picker.

(2) Relation field

If your entity has a relation to another relation, you will see that in the form. The link data button will bring you to the link relation popover where you can link the correct entities.

(3) Extract button

The extract button will open a pop-up to start an automated metadata extraction using AI based on the files you already uploaded in the form.

(4) Create/cancel buttons

These buttons allow you to submit or cancel the entity creation.

(5) Document preview

The document preview allows you to see the documents added next to the form. This can be practical when you need to read data from the document to fill in the form. The extract feature will also overlay information in the preview when used.

After clicking the link data button in the create form a popover will appear that will help you link related entities.

Add relation Add relation

(1) Search form

The search form in this popover functions similarly to the entity search form and searches on the linked entity.

(2) Result table

After pressing the “SEARCH” or “SHOW ALL” button, the results table shows the candidates for linking. Just click a line to link the entity. It is possible to link multiple entities if it is a “TO MANY” relationship.

(3) Create button

This button will open a new tab on the create form of the entity type you are trying to link. Use this when the entity you want to link does not yet exist.